About This Recipe
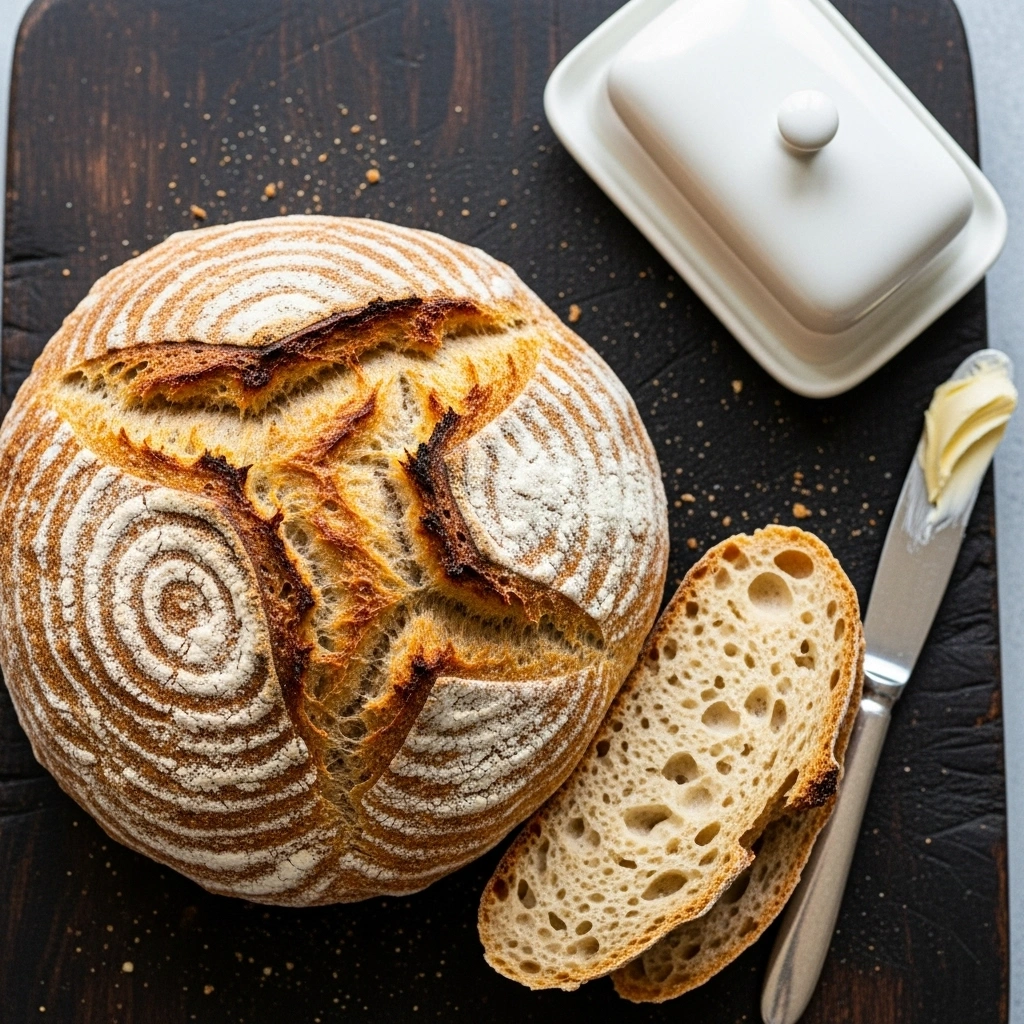
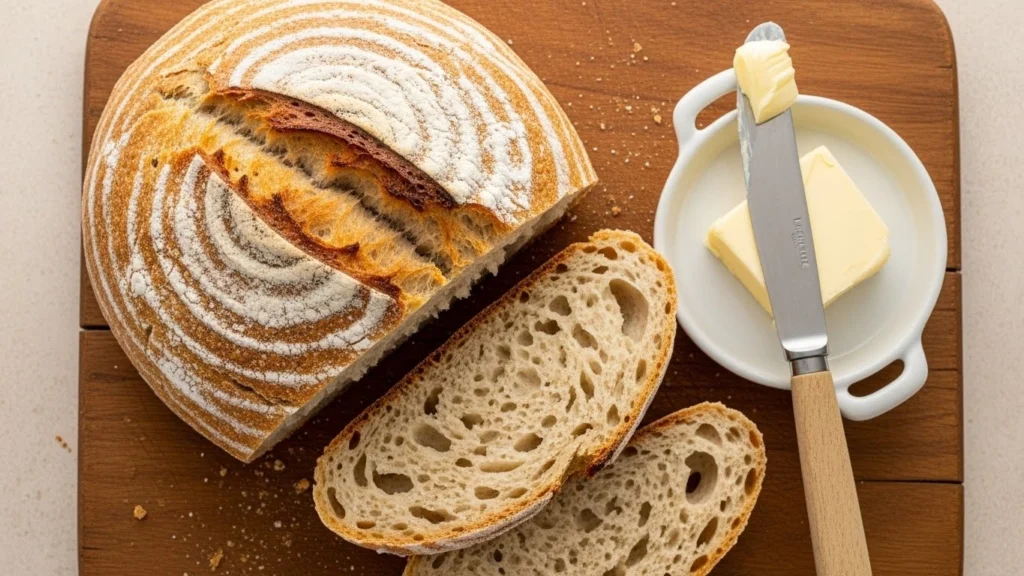
This no-knead gluten-free bread gives you an artisan-style loaf—crusty on the outside, soft and tender inside—without kneading or special equipment. You simply:
- Stir everything together in one bowl
- Let it rise
- Bake (ideally in a hot Dutch oven, but a loaf pan works too)
It’s:
- 100% gluten-free using a good 1:1 GF flour blend
- Yeast-risen (no sourdough starter needed)
- Perfect for toast, sandwiches, and soup dipping
- Beginner-friendly—especially if you’re new to gluten-free bread
Ingredients: What You’ll Need
Weights give the most consistent results, especially for bread. Cup measures are approximate.
Dry Ingredients
- 3 cups (360–380 g) gluten-free 1:1 all-purpose flour blend
- Use a blend formulated for baking (with rice flour + starches)
- 2½ tsp (8 g) instant yeast or active dry yeast
- 1½ tsp (8–9 g) fine sea salt
- 2 Tbsp (25 g) sugar or honey (helps feed the yeast)
- 2 Tbsp (10–12 g) psyllium husk powder
- For structure & chew (highly recommended)
Wet Ingredients
- 1¾–2 cups (420–480 ml) warm water (about 40–45°C / 105–115°F)
- Start with 1¾ cups; add more 1 Tbsp at a time if the dough is too dry
- 2 Tbsp (30 ml) olive oil (or neutral oil)
- 1 tsp apple cider vinegar or lemon juice (improves crumb & flavor)
Equipment
- Large mixing bowl
- Dough whisk, spatula, or sturdy spoon
- Parchment paper
- Dutch oven with lid (preferred, for best crust)
- OR 900 g / 2 lb loaf pan
- Digital kitchen scale (strongly recommended)
Instructions: Step-by-Step Preparation
1. Activate Yeast (If Using Active Dry)
If you’re using instant yeast, skip to step 2.
- In a small bowl, combine:
- Warm water (1¾ cups / 420 ml)
- Sugar (or honey)
- Yeast
- Stir and let sit 5–10 minutes, until foamy and bubbly.
If it doesn’t foam, your yeast may be dead—start again with fresh yeast.
2. Mix Dry Ingredients
- In a large mixing bowl, whisk together:
- Gluten-free flour
- Psyllium husk powder
- Salt
3. Add Wet Ingredients
- Add to the dry mixture:
- Warm water + yeast/sugar mixture (or warm water, sugar, and instant yeast if skipping activation)
- Olive oil
- Vinegar
- Stir well with a dough whisk, spatula, or sturdy spoon until everything is fully combined.
- Dough will be more like a thick, sticky batter than a traditional kneadable dough.
- If it seems too dry/crumbly, add warm water 1 Tbsp at a time until it holds together and looks like thick batter.
- If very runny, sprinkle in a bit more GF flour or psyllium.
4. First Rise (Bulk Fermentation)
- Scrape down the sides of the bowl and smooth the top of the dough.
- Cover the bowl with plastic wrap, a plate, or a damp kitchen towel.
- Let rise in a warm, draft-free spot for 1–1½ hours, until:
- Puffier
- Slightly domed
- It may not double like wheat bread, but it should visibly increase in volume
5. Shape for Baking
For Dutch Oven (Artisan Boule – Best Crust):
- Cut a piece of parchment large enough to fit inside your Dutch oven with some overhang.
- Flour or lightly oil your hands and a spatula.
- Scrape the dough onto the parchment, forming a rough ball or oval.
- With damp or oiled hands, gently smooth and round the dough into a tight ball, pulling the surface taut.
- Cover lightly with a towel and let it rest 20–30 minutes (second rise) while you preheat the oven.
For Loaf Pan:
- Grease a 900 g / 2 lb loaf pan and line with parchment (optional but helpful).
- Scrape the dough into the pan, smoothing the top with damp hands or a spatula.
- Cover and let rise 20–30 minutes while the oven preheats.
6. Preheat Oven (and Dutch Oven, if using)
- Place your Dutch oven (with lid) in the oven.
- Preheat the oven to 230°C (about 450°F) for at least 30 minutes to get the pot very hot.
If using a loaf pan only (no Dutch oven), just preheat the oven to 220°C (425°F) about 20–30 minutes before baking.
7. Score & Bake
Dutch Oven Method:
- Carefully remove the hot Dutch oven from the oven (use heavy oven mitts).
- Lift the parchment with the dough and gently lower it into the Dutch oven.
- Use a sharp knife or lame to score a 1 cm deep slash across the top (optional, but helps control expansion).
- Cover with lid and bake:
- 25 minutes covered
- Then remove the lid, lower the temp to 210°C (410°F), and bake 20–25 minutes more, until:
- Deep golden brown
- Internal temperature reaches 96–98°C (205–208°F)
Loaf Pan Method:
- Score the top if you like.
- Bake at 220°C (425°F) for 15 minutes, then reduce to 200°C (390°F) and bake another 25–30 minutes, until:
- Deep golden
- Internal temp reaches 96–98°C (205–208°F)
Using a thermometer is the best way to know your GF bread is baked through (no gummy centers).
8. Cool Completely
- Remove bread from the Dutch oven or loaf pan and place on a wire rack.
- Allow to cool completely—at least 1–2 hours—before slicing.
Gluten-free bread must cool fully so the crumb can set; slicing too early leads to a gummy texture.
How to Store It
- Room Temperature:
- Wrap in a clean towel or store in a bread bag/airtight container for 1–2 days. Best texture on day 1.
- Refrigerator:
- Store up to 4–5 days; toast slices for best flavor and texture.
- Freezer:
- Slice fully cooled bread, wrap slices individually, and freeze up to 2 months.
- Toast straight from frozen.
Smart Ingredient Swaps
- No Psyllium Husk Powder?
- You can use whole psyllium husk (about 3 Tbsp), but reduce slightly if the dough gets too gummy.
- Without psyllium, bread will be more crumbly and less chewy.
- Dairy-Free:
- This recipe is already dairy-free if you use oil and water only.
- Flavor Boosters:
- Add 1–2 Tbsp olive oil for flavor and a slightly softer crumb.
- Add seeds (sesame, sunflower, pumpkin) to the top before baking.
How to Serve It
Use this no-knead gluten-free bread for:
- Toast with butter, jam, nut butter, or avocado
- Sandwiches (once fully cooled and sliced)
- Garlic bread (toast slices with garlic butter)
- Dipping into soups, stews, and chili
It’s a sturdy everyday bread with a tender crumb—versatile enough for breakfast, lunch, and dinner.
Tips for Best No-Knead Gluten-Free Bread
- Use a good 1:1 GF flour blend—results vary by brand.
- Measure dry ingredients accurately (a scale is ideal).
- Don’t be tempted to add too much flour; GF bread dough should be wetter than wheat dough.
- Let the dough rise fully, and the baked bread cool completely. These two patient steps make or break the texture.
- For extra crust, use a preheated Dutch oven and let the loaf bake uncovered until deeply golden.
Frequently Asked Questions
Why is my gluten-free bread gummy inside?
- Most common reasons:
- Underbaking (internal temp below ~96°C/205°F)
- Slicing before it is completely cooled
- Too much water or not enough psyllium
- Solution: bake longer, check internal temp, and cool fully.
Can I make this bread overnight?
- Yes. After mixing and the first rise, shape the dough and place in the pan/basket. Cover and refrigerate 8–12 hours, then bake straight from the fridge, adding a few extra minutes if needed.
Can I use only almond or coconut flour?
- No. Those flours behave very differently and need completely different recipes. Stick to a 1:1 GF blend here.
Can I add whole seeds or nuts?
- Yes. Fold in up to ½ cup (50–60 g) of seeds/nuts during mixing, or just sprinkle on top before baking.
No Knead Gluten-Free Bread (Crispy Crust, Soft Center & So Easy)
Description
This no-knead gluten-free bread uses a 1:1 GF flour blend, psyllium husk, and yeast to create a loaf that’s crusty on the outside and soft inside—without kneading. Perfect for toast, sandwiches, and serving with soups and stews.
Ingredients
Instructions
- If using active dry yeast, combine warm water, sugar, and yeast and let sit 5–10 minutes until foamy. If using instant yeast, skip this step and add the yeast with the dry ingredients.
- In a large bowl, whisk gluten-free flour, psyllium husk powder, and salt.
- Add activated yeast mixture (or warm water, sugar, and instant yeast), olive oil, and vinegar. Mix until a thick, sticky dough/batter forms. Adjust water or flour slightly if needed.
- Cover the bowl and let rise in a warm place 1–1½ hours, until puffy.
- For a Dutch oven loaf, shape dough into a ball on parchment and let rest 20–30 minutes while preheating oven and Dutch oven to 230°C. For a loaf pan, scrape dough into a greased pan, smooth the top, and let rise 20–30 minutes.
- Score the top if desired. Bake in Dutch oven: 25 minutes covered at 230°C, then 20–25 minutes uncovered at 210°C until deep golden and internal temp reaches 96–98°C. For loaf pan: bake at 220°C for 15 minutes, then at 200°C for 25–30 minutes.
- Remove from the pan and cool fully on a wire rack before slicing.
Notes
- A Dutch oven produces the best crust; a loaf pan works well, too.
Psyllium husk is key for structure; skipping it will change the texture.
Use a digital thermometer for best results; GF bread must be baked through.
Bread slices freeze well and are best toasted after the first day.