About This Recipe
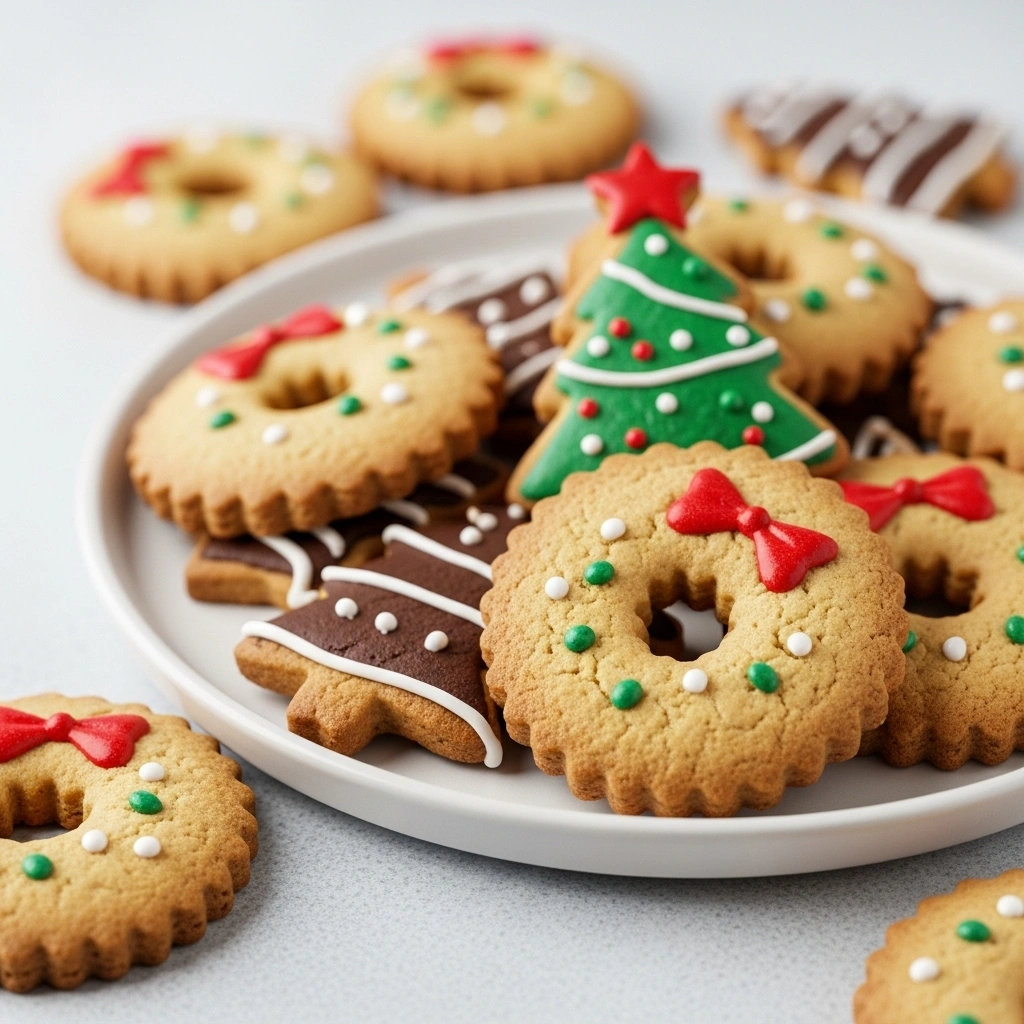
There’s something magical about baking Christmas cookies that transforms your kitchen into a winter wonderland. The warm aroma of vanilla and butter, the sparkle of colorful sprinkles, and the joy on loved ones’ faces—this is what the holiday season is all about.
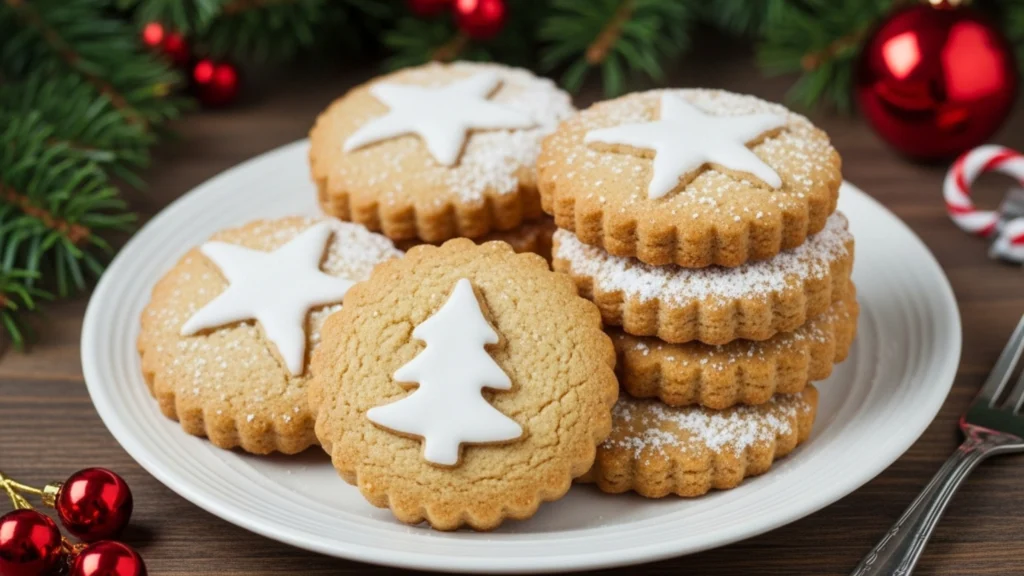
This classic Christmas cookies recipe delivers buttery, melt-in-your-mouth treats perfect for cookie exchanges, holiday parties, or enjoying with hot cocoa by the fireplace. With just 15 minutes prep and 10-12 minutes baking time, you’ll have beautiful festive cookies ready in under an hour.
What makes these cookies special:
- Perfectly tender texture that melts on your tongue
- Versatile base for any cookie-cutter shape
- Simple pantry ingredients
- Kid-friendly decorating fun
Ingredients: What You’ll Need
For the Cookie Dough:
- 2 ¾ cups all-purpose flour, spooned and leveled
- 1 cup unsalted butter, softened to room temperature
- 1 cup granulated sugar
- 1 large egg, room temperature
- 2 teaspoons pure vanilla extract
- 1 teaspoon baking powder
- ½ teaspoon salt
- ¼ teaspoon almond extract (optional)
For Decorating:
- Royal icing or buttercream frosting
- Festive sprinkles (red, green, gold, silver)
- Colored sanding sugar
- Edible glitter or pearl dust
- Food coloring gels
Instructions: Step-by-Step Preparation
Step 1: Prepare Your Workspace
- Preheat oven to 350°F (175°C)
- Line two baking sheets with parchment paper
- Clear a surface for rolling dough
Step 2: Cream Butter and Sugar
- Beat softened butter and sugar for 3-4 minutes until light and fluffy
- The mixture should look pale and increased in volume
Step 3: Add Wet Ingredients
- Beat in egg until incorporated
- Mix in vanilla and almond extract
- Scrape down bowl sides
Step 4: Combine Dry Ingredients
- Whisk together flour, baking powder, and salt
- Gradually add to wet ingredients on low speed
- Mix just until combined
Step 5: Chill the Dough
- Divide the dough into two flat disks
- Wrap tightly in plastic wrap
- Refrigerate for at least 30 minutes
Step 6: Roll and Cut
- Roll the dough to a ¼-inch thickness on a floured surface
- Cut festive shapes (stars, trees, snowflakes)
- Place 2 inches apart on baking sheets
Step 7: Bake to Perfection
- Bake 10-12 minutes until edges are just set
- Centers may look slightly underdone
- Cool on the sheet for 5 minutes, then transfer to a wire rack
Step 8: Decorate
- Wait until completely cool
- Unleash creativity with icing and sprinkles
How to Store It
Room Temperature:
- Store in an airtight container up to 7 days
- Layer parchment paper between cookies
- Add a bread slice to maintain softness
- Keep in a cool, dry place
Pro tip: Store decorated and undecorated cookies separately to preserve appearance.
Smart Ingredient Swaps
Dietary Modifications:
- Gluten-free: Use 1:1 gluten-free baking flour
- Dairy-free: Substitute plant-based butter
- Egg-free: Use flax egg (1 tbsp ground flaxseed + 3 tbsp water)
- Lower sugar: Reduce to ¾ cup
Flavor Variations:
- Add lemon zest for a citrusy twist
- Mix in ½ tsp cinnamon for spiced cookies
- Fold in ½ cup mini chocolate chips
How to Serve It
Presentation Ideas:
- Arrange on a festive platter with pine sprigs
- Package in cellophane bags with ribbon for gifts
- Create a cookie tower centerpiece
- Serve with hot chocolate or spiced cider
Perfect Pairings:
- Fresh-brewed coffee or espresso
- Warm apple cider with cinnamon
- Peppermint hot chocolate
- Sweet dessert wines
Cultural Background & Personal Touches
Christmas cookie traditions date back to medieval Europe, where elaborately decorated cookies celebrated winter festivals. German springerle and Dutch speculaas were among the earliest versions.
Making It Your Own:
- Create signature family cookie shapes
- Develop special icing color combinations
- Start annual cookie exchange traditions
Seasonal Variations
- Valentine’s Day: Heart shapes with pink and red icing
- Easter: Bunnies and eggs with pastel decorations
- Halloween: Pumpkins and ghosts with orange and black
- Fourth of July: Stars with red, white, and blue
- Year-Round: Perfect for birthdays and celebrations
Tried & Tested Feedback
What Readers Say:
- “Perfect shape retention and amazing taste!” – Sarah M.
- “Kids loved decorating. Easy dough to work with.” – Jennifer L.
- “Best Christmas cookie recipe ever!” – Michael R.
Success Tips:
- Never skip chilling the dough
- Use room temperature butter
- Rotate sheets halfway through baking
Freezer-Friendly Version
Freezing Options:
- Unbaked dough: Freeze up to 3 months, thaw in fridge overnight
- Cut cookies (unbaked): Freeze on sheet, then transfer to bags; bake from frozen
- Baked cookies: Freeze undecorated up to 3 months in airtight containers
Frequently Asked Questions
Q: Why did my cookies spread? A: Dough wasn’t chilled enough, or the butter was too warm. Always refrigerate for 30+ minutes.
Q: Can I make dough ahead? A: Yes! Refrigerate up to 3 days or freeze up to 3 months.
Q: How do I prevent hard cookies? A: Don’t overbake—remove when edges are just set.
Q: Best icing for decorating? A: Royal icing for clean lines, buttercream for richer taste.
Q: Can I double this recipe? A: Absolutely! Recipe doubles beautifully.
Final Thoughts
Creating Christmas cookies from scratch is about more than baking—it’s crafting memories and sharing traditions. This recipe delivers consistently delicious results for bakers of all skill levels.
These cookies are a blank canvas for your creativity, whether you prefer elegant royal icing or cheerful sprinkles. The imperfect shapes and decorating laughter become part of your family’s unique holiday story.
Gather your ingredients, preheat that oven, and let the Christmas cookie magic begin. Share your creations with us—we’d love to see how they turned out!
Happy baking and Merry Christmas! 🎄
Classic Christmas Cookies Recipe – Festive Holiday Baking Made Easy
Description
Classic Christmas sugar cookies with a buttery, tender crumb and crisp edges. Perfect for decorating and gifting during the holiday season.
Ingredients
Instructions
- Cream butter and sugar until light and fluffy (3-4 minutes)
- Beat in egg and vanilla extract
- Whisk together flour, baking powder, and salt in a separate bowl
- Gradually mix the dry ingredients into the butter mixture on low speed
- Divide the dough into two disks, wrap, and refrigerate 1 hour minimum
- Preheat oven to 175°C (350°F) and line baking sheets with parchment
- Roll dough to ¼-inch thickness on a floured surface
- Cut shapes and place 2 inches apart on prepared sheets
- Bake 8-10 minutes until edges are barely golden
- Cool on the sheet for 5 minutes, then transfer to a wire rack
- Decorate once completely cooled
Notes
- . Dough can be refrigerated up to 3 days or frozen up to 3 months
. Don’t overbake – cookies continue firming as they cool
. For cleaner cuts, dip cookie cutters in flour between cuts
. Royal icing dries hard for stacking; buttercream stays softer
. Store unfrosted cookies up to 2 weeks, frosted cookies up to 1 week