About This Recipe
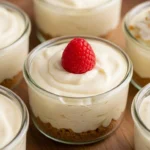
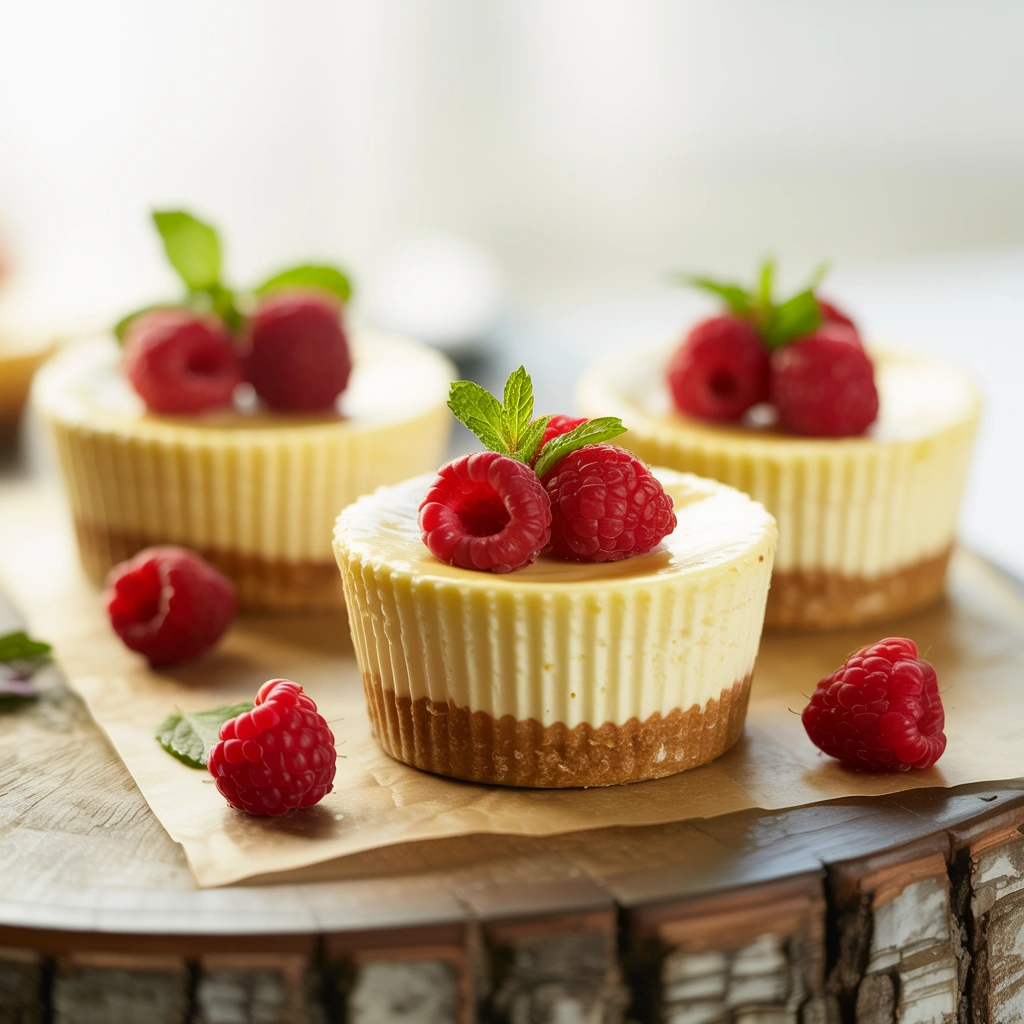
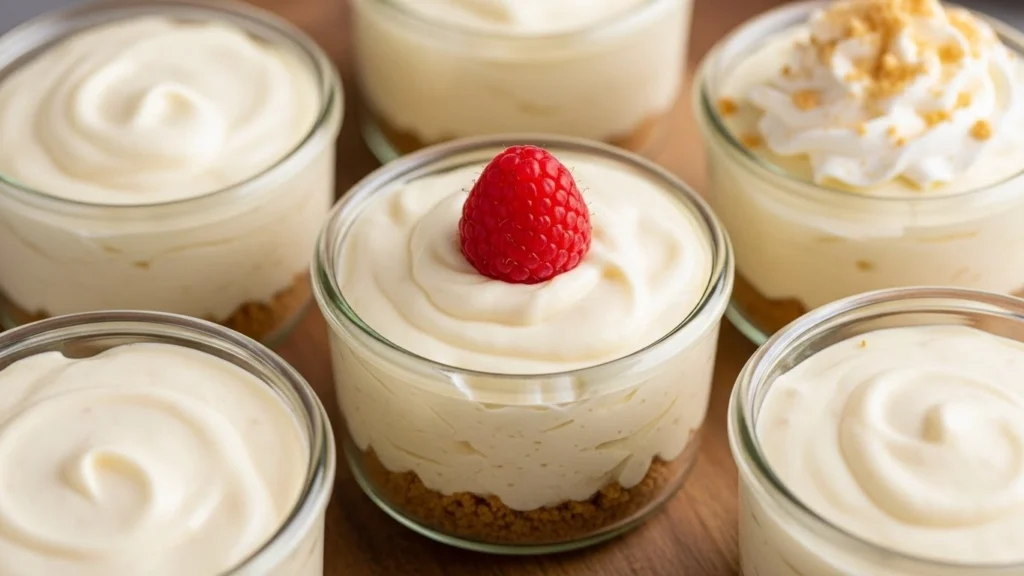
These no bake cheesecake cups are individual, creamy mini cheesecakes layered in jars or cupcake liners—no oven, no water bath, and no stress.
They’re perfect for:
- Parties, BBQs, birthdays, and holidays
- Make‑ahead desserts and portion‑controlled treats
- When you want cheesecake without baking a full cake
Why you’ll love this no bake cheesecake cups recipe:
- No baking, no eggs, no cracking
- Quick to assemble (about 20 minutes + chilling)
- Customizable with your favorite toppings
- Great for entertaining—easy to serve and transport
Ingredients: What You’ll Need
For the Mini Crusts
- 130 g graham cracker crumbs or digestive biscuit crumbs (about 1 cup)
- 55 g unsalted butter, melted (4 Tbsp)
- 1 Tbsp granulated sugar (optional)
- 1 pinch fine sea salt
For the Cheesecake Filling
- 300 g full‑fat cream cheese, softened (about 10.5 oz)
- 80 g powdered sugar, sifted (⅔ cup)
- 1 tsp pure vanilla extract
- 2 tsp fresh lemon juice (for a light tang)
- 200 ml cold heavy whipping cream (about ¾ cup)
Optional Toppings
- Fresh berries (strawberries, raspberries, blueberries)
- Fruit curd or pie filling (lemon curd, cherry, blueberry)
- Crushed cookies or biscuit crumbs
- Chocolate or caramel sauce
- Shaved chocolate or sprinkles
Tools
- 8–10 small glass jars, ramekins, or a muffin tin with cupcake liners
- Mixing bowls
- Hand mixer or stand mixer
- Rubber spatula
Instructions: Step‑By‑Step Preparation
- Prepare the Crust Mixture
- In a small bowl, combine:
- Graham cracker crumbs
- Melted butter
- Sugar (if using)
- Pinch of salt
- Stir until crumbs are evenly moistened and clump when pressed.
- In a small bowl, combine:
- Portion & Press the Crust
- Divide crumb mixture evenly among your jars/cups (about 1–2 Tbsp per cup).
- Press firmly into the bottom using:
- The back of a spoon, or
- Your fingers or the base of a small glass.
- Place cups in the fridge while you prepare the filling.
- Beat the Cream Cheese Base
- In a medium bowl, beat softened cream cheese until very smooth (2–3 minutes).
- Add powdered sugar, vanilla, and lemon juice.
- Beat again until creamy, silky, and lump‑free.
- Whip the Cream
- In a separate chilled bowl, whip cold heavy cream to stiff peaks:
- The cream should stand straight when you lift the beaters.
- Do not over‑whip to the point of graininess.
- In a separate chilled bowl, whip cold heavy cream to stiff peaks:
- Fold the Filling Together
- Add about ⅓ of the whipped cream to the cream cheese mixture and fold gently to lighten.
- Add the remaining whipped cream and fold until completely combined and airy, with no streaks.
- Fill the Cups
- Spoon or pipe the cheesecake filling over the chilled crusts, filling each cup about ¾–full.
- Smooth the tops with a spoon or swirl for a pretty finish.
- Chill to Set
- Cover the cups lightly with plastic wrap or lids.
- Refrigerate for at least 3–4 hours, or preferably overnight, until set and spoonable like firm mousse.
- Top & Serve
- Just before serving, add your favorite toppings:
- Fresh berries
- Fruit sauce
- Chocolate or caramel drizzle
- Crushed cookies or nuts
- Just before serving, add your favorite toppings:
How to Store It
- Refrigerator
- Cover and store no bake cheesecake cups for up to 3–4 days.
- Add fresh fruit toppings as close to serving as possible for best texture.
- Tip
- If using very juicy fruit or pie filling, spoon it on just before serving to avoid soggy tops.
Smart Ingredient Swaps
- Gluten‑Free
- Use gluten‑free graham crackers or crunchy gluten‑free cookies for the crust.
- Dairy‑Free / Vegan
- Use dairy‑free cream cheese and whipped coconut cream.
- Swap butter for vegan butter or melted coconut oil.
- Lower Sugar
- Reduce powdered sugar to 50 g (about ½ cup) and use unsweetened fruit toppings.
- Flavor Variations
- Add zest of 1 lemon or orange to the filling for a citrus version.
- Swap vanilla for almond extract for a bakery‑style twist.
How to Serve It
- Serve chilled in:
- Mini jars for parties and buffets
- Pretty glasses for dinner parties
- Cupcake liners for casual gatherings and kids
- Serving tips:
- Arrange cups on a tray with assorted toppings so guests can choose their favorite.
- Add name tags or flavor tags (e.g., “Lemon Berry,” “Chocolate Caramel”).
Cultural Background & Personal Touches
No bake cheesecakes became popular as refrigerator desserts in mid‑20th‑century home cooking. Cheesecake cups are a modern, individual‑serving spin that:
- Are easier to portion and transport
- Look elegant without extra effort
- Let you offer multiple flavors in one batch
I love using:
- A mix of toppings so every cup feels unique
- Clear glass jars so all the pretty layers show
Seasonal Variations
- Spring
- Top with fresh berries and a bit of lemon zest.
- Summer
- Use mango or passionfruit purée, or a simple strawberry sauce.
- Fall
- Swirl in cinnamon and top with apple or pumpkin pie filling.
- Winter / Holidays
- Use cherry pie filling, chocolate shavings, or crushed peppermint.
Tried & Tested Feedback
From friends and family taste tests:
- “Tastes like a fancy cheesecake from a restaurant.”
- “Love that they’re not too heavy and perfectly portioned.”
- “Great for parties—everyone gets their own dessert cup.”
Freezer-Friendly Version
- To Freeze
- Assemble cheesecake cups without fresh fruit toppings.
- Wrap well or cover with lids and freeze for up to 1 month.
- To Serve
- Thaw overnight in the fridge.
- Add fresh toppings just before serving.
Frequently Asked Questions
Do I have to use a mixer?
A mixer is best for a smooth filling, but you can use a whisk and strong arm—just be sure cream cheese is very soft and cream is well whipped.
Why is my filling runny?
The cream may not have been whipped to stiff peaks, or the cups haven’t chilled long enough. Chill for several hours or overnight.
Can I make these ahead?
Yes. They’re ideal made 1 day ahead and topped just before serving.
Final Thoughts
No bake cheesecake cups are an easy, elegant way to enjoy cheesecake without committing to a full cake or turning on the oven. They’re creamy, customizable, and perfect for everything from weeknight treats to special‑occasion dessert tables.
No Bake Cheesecake Cups (Creamy Mini Cheesecakes in 20 Minutes)
Description
Individual no bake cheesecake cups with a buttery graham cracker crust and light, creamy cheesecake filling. Easy, make‑ahead mini cheesecakes perfect for parties, holidays, and weeknight desserts.
Ingredients
Instructions
- Mix crumbs, melted butter, sugar, and salt until evenly moistened.
- Divide mixture among 8–10 jars or cups and press firmly into the bottoms. Chill while preparing filling.
- Beat cream cheese until smooth. Add powdered sugar, vanilla, and lemon juice; beat until creamy and lump‑free.
- In a separate bowl, whip cream to stiff peaks.
- Fold one‑third of the whipped cream into the cream cheese mixture, then gently fold in the rest until fully combined and airy.
- Spoon or pipe filling over the chilled crusts, filling each cup about ¾ full.
- Cover and refrigerate at least 3–4 hours, preferably overnight, until set.
- Top with fresh fruit, sauces, or other toppings just before serving.
Notes
- Use full‑fat cream cheese for best texture and structure.
For gluten‑free cups, use gluten‑free cookies in the crust.
Cheesecake cups can be frozen without toppings for up to 1 month; thaw in the fridge.
Adjust sweetness by adding or reducing powdered sugar slightly to taste.