About This Recipe
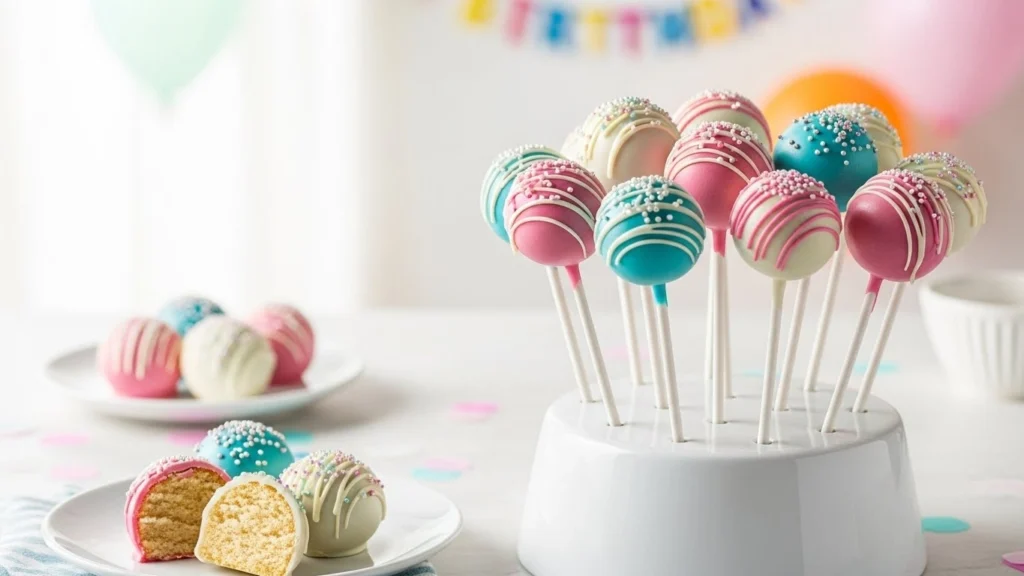
Cake pops are bite-sized, hand-held cake balls coated in chocolate and dressed up with sprinkles. They’re fun, customizable, and perfect for birthdays, holidays, and party dessert tables.
You’ll get:
- Texture
- Soft, moist cake center
- Slightly fudgy from the frosting
- Snappy chocolate or candy coating
- Flavor
- Classic vanilla (or chocolate) cake
- Sweet, creamy frosting
- Smooth white or dark chocolate shell
Why you’ll love this cake pop recipe:
- Uses a simple 9×13 cake (from scratch or cake mix)
- Great way to use leftover cake
- Easy to decorate for any theme or holiday
- Perfect for making ahead and freezing
Ingredients: What You’ll Need
For the Cake Pop Center
You’ll need one baked 9×13-inch (23×33 cm) cake, fully cooled. Use:
- 1 baked vanilla or chocolate cake, from:
- Your favorite recipe, or
- 1 box cake mix prepared as directed
You’ll use about ¾ of the cake (crumbs) for ~24 cake pops.
For the Binder (Frosting)
- ½ cup (115 g) frosting, such as:
- Vanilla buttercream
- Chocolate buttercream
- Cream cheese frosting (for carrot/red velvet cake pops)
You may need a bit more or less, depending on how moist your cake is.
For the Coating & Decoration
- 2 cups (350–400 g) candy melts or chocolate:
- White, milk, dark, or colored candy melts
- 1–2 tbsp vegetable shortening or coconut oil
- Optional, to thin the coating
- Sprinkles, crushed cookies, or a drizzle for decoration
- 24–30 lollipop sticks
Instructions: Step-by-Step Preparation
1. Bake & Cool the Cake
- Bake a 9×13 cake (any flavor) according to your recipe or box directions.
- Let the cake cool completely—it’s best if it’s a few hours old or even baked the day before.
2. Crumble the Cake
- Cut away any very browned edges if desired.
- In a large bowl:
- Crumble about ¾ of the cake into fine crumbs using clean hands or a fork.
- You want even, sand-like crumbs, no big chunks.
3. Add Frosting & Form the Dough
- Add ¼ cup frosting to the crumbs and mix with a spoon or your hands.
- Check texture:
- Dough should hold together when pressed, like playdough, but not feel wet or greasy.
- Add more frosting, 1 tablespoon at a time, until:
- You can roll a smooth ball that doesn’t crack apart or feel mushy.
4. Shape the Cake Balls
- Use a small cookie scoop or tablespoon to portion dough.
- Roll into smooth balls about 1–1¼ inches (2.5–3 cm) in diameter.
- Place on a parchment-lined baking sheet.
- Chill:
- Freezer: 15–20 minutes, or
- Fridge: 1–2 hours
until firm but not rock-hard.
5. Prepare the Coating
- Melt candy melts or chocolate in a microwave-safe bowl:
- Heat in 20–30 second bursts, stirring between each, until smooth.
- If too thick, stir in ½–1 tsp shortening/oil at a time to thin.
- Transfer to a deep, narrow cup or bowl for easier dipping.
6. Attach the Sticks
- Dip ¼ inch (0.5 cm) of each lollipop stick into melted coating.
- Insert a stick halfway into each chilled cake ball.
- Return to the fridge for 5–10 minutes to set the “glue.”
7. Dip the Cake Pops
- Working with a few at a time:
- Hold the stick and dip the cake pop straight down into the melted coating.
- Gently tilt and rotate to coat completely.
- Lift out and tap the stick lightly on the rim, rotating, to let excess drip off.
- Add sprinkles immediately before the coating sets.
- Stick cake pops upright into:
- A styrofoam block
- A cake pop stand
- Or place upside down on parchment for a “flat top” style
- Let the coating set completely at room temperature or in the fridge.
How to Store It
- Room temperature:
- Up to 2 days (cool, dry place; if using buttercream).
- Refrigerator:
- Up to 5–7 days in an airtight container.
- Serving tip:
- Let chilled cake pops sit at room temperature for 10–15 minutes before serving for the best texture.
Smart Ingredient Swaps
- Cake flavor ideas:
- Red velvet + cream cheese frosting
- Lemon cake + lemon buttercream
- Funfetti cake + vanilla frosting
- Brownie + chocolate frosting for ultra-fudgy pops
- No candy melts?
- Use good-quality chocolate (add 1–2 tsp oil to help set smoother).
- Dairy-free:
- Use dairy-free cake mix and frosting, and dairy-free chocolate coating.
- Less sweet center:
- Use less frosting and a slightly drier cake crumb for a less sweet pop.
How to Serve It

- Party display:
- Arrange upright in a cake pop stand, floral foam, or decorated styrofoam block.
- Favors:
- Wrap each in a small cellophane bag and tie with ribbon.
- Dessert table:
- Mix different colors and sprinkle themes on a platter.
Great for:
- Birthdays
- Weddings & showers
- Holiday dessert tables
- Kids’ parties and bake sales
Cultural Background & Personal Touches
Cake pops were popularized in the late 2000s—especially by Bakerella and big coffee chains—as a playful way to:
- Use leftover cake
- Serve bite-size treats
- Turn cake into a portable, mess-free dessert
They’re especially loved because:
- You can customize colors and decorations for any theme
- They’re great for kids to help decorate
- They look impressive, even if the process is quite forgiving
Seasonal Variations
- Spring/Easter:
- Pastel-colored coatings, flower or bunny sprinkles.
- Summer:
- Strawberry or lemon cake pops with white chocolate coating.
- Fall:
- Pumpkin or spice cake with white coating + cinnamon sugar sprinkle.
- Christmas:
- Red velvet + green and white sprinkles, or peppermint crunch topping.
- Halloween:
- Orange and black coatings, candy eyes, spider web drizzle.
Tried & Tested Feedback
From multiple batches and party tests:
- “These look like they’re from a bakery.”
- “Perfect texture—not gummy, not crumbly.”
- “Kids loved decorating them as much as eating them.”
Freezer-Friendly Version
- To freeze cake pops (uncoated):
- Shape and chill cake balls, then freeze on a tray until firm.
- Transfer to a freezer bag or container; freeze up to 2 months.
- Thaw in the fridge, then add sticks and coat.
- To freeze finished cake pops:
- Freeze upright until firm, then wrap.
- Thaw in the fridge or at cool room temperature (coating may develop slight condensation).
Frequently Asked Questions
Why are my cake pops cracking?
- Coating too hot + cake balls too cold can cause cracks.
- Let cake balls warm slightly out of the fridge before dipping, and let the coating cool a bit after melting.
Why are they falling off the stick?
- Mixture too soft (too much frosting).
- Cake balls are too heavy or not chilled enough.
- Not dipping the stick in the coating before inserting.
Can I make them without sticks?
- Yes—make cake truffles:
- Dip balls and place on parchment without sticks.
How many cake pops does this make?
- About 24–30, depending on size.
Final Thoughts
Cake pops are one of the most versatile, party-perfect desserts you can make: a little bit of baking, a little bit of crafting, and a whole lot of fun. Once you get the hang of the crumble–mix–dip routine, you can create endless flavor and decoration combinations for any occasion.
Easy Cake Pops (From Scratch or Cake Mix)
Description
Fun, bite-sized cake pops made from crumbled cake mixed with frosting, rolled into balls, and dipped in chocolate or candy melts. Perfect for birthdays, holidays, and party favors, and a great way to use leftover cake.
Ingredients
Instructions
- Bake a 9×13 cake and let it cool completely (or use leftover cake).
- Crumble about ¾ of the cake into a large bowl, making fine, even crumbs.
- Add ¼ cup frosting and mix with a spoon or hands. Add more frosting 1 tbsp at a time until the mixture holds together like playdough—moist but not wet.
- Roll into balls about 1–1¼ inches (2.5–3 cm) in diameter. Place on a parchment-lined baking sheet and chill in the fridge 1–2 hours or freezer 15–20 minutes, until firm.
- Melt candy melts or chocolate in 20–30 second intervals in the microwave, stirring between each until smooth. Thin with a little shortening/oil if needed. Transfer to a deep, narrow cup.
- Dip ¼ inch of each lollipop stick into the melted coating, then insert halfway into each chilled cake ball. Chill 5–10 minutes to set.
- Dip each cake pop straight down into the coating, then gently tap and rotate to remove excess. Add sprinkles immediately before coating sets. Place upright in a stand or upside down on parchment.
- Let coating set completely at room temperature or in the fridge. Store in an airtight container until serving.
Notes
- Use less frosting for a less sweet, more cake-like center.
If cake pops crack, let cake balls warm slightly and let coating cool a bit before dipping.
For truffles (no sticks), simply dip balls and place on parchment.
Great with any cake flavor: vanilla, chocolate, red velvet, lemon, carrot, etc.